How to Integrate Your Project Management System with ClickTime!
Table of Contents
If you’ve ever had to manage a project and have your employees track time against it, you know how much of a pain it is to do the administrative work of setting up the project and tasks in multiple systems.
While Project Management tools like Asana, Basecamp, and Trello make it easy to plan projects, a time tracking tool like ClickTime empowers your organization to make data-driven decisions based on real-time data and allocate your resources to facilitate your capacity planning. To really get the value from these tools, you need to create your project, tasks, and teammates in both systems.
Maintaining both systems manually increases your overhead, is more prone to human error, and is just plain frustrating. But don’t worry, we’re here to help! Here is a step-by-step guide on how to decrease, and in some cases, even eliminate the tedious set up process between your project management and time tracking systems!
What is Zapier?
Zapier is cloud glue software. You can integrate your apps and automate workflows by simply pointing and clicking. Learn more about the Zapier platform with Zapier's Getting Started Guide.
What You'll Need
To automate your workflow via Zapier, you will need the following accounts:
- ClickTime Account
- Zapier Account
- Project Management Account (in this post, we will use Jira)
Step-by-Step Guide
For this guide, we will be automating the process of creating projects in ClickTime.
Figure out your company’s mappings
Your project-management-to-time-tracking setup will vary depending on each company, but you just need to find the right translation between systems, and the concepts are all the same. For this case, we will consider the following entity mapping between Jira and ClickTime:
| Jira | ClickTime |
|---|---|
| Project | Client |
| Issue | Project |
Create a Brand New Zap
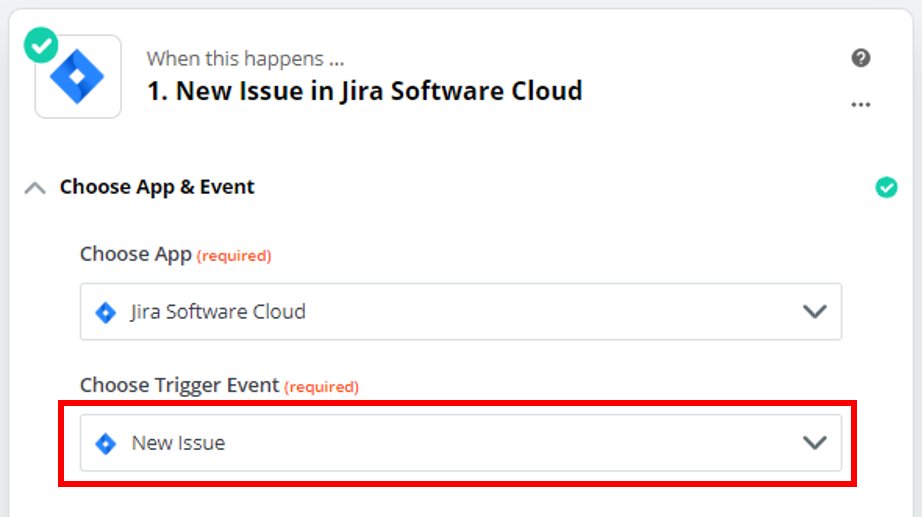
Set up your trigger App & Action (Jira)
- Jira has multiple Trigger events. For this example, we’ll assume all Issues within a Jira project will be an individual ClickTime project.
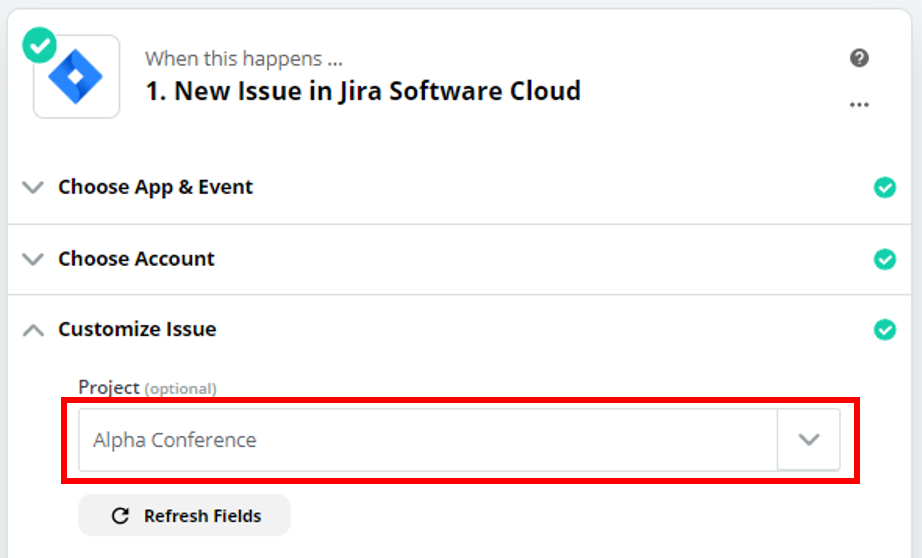
- Select the Jira Project you want to work with. Remember that the Jira Project will be equivalent to your ClickTime Client. In other words, all your Jira Issues will be created as ClickTime Projects related to the same ClickTime Client.
- Zapier will ask you to test your Zap, make sure you have at least one Jira Issue in your Project to verify that the connection is working as expected!
Select your Action App & Action (ClickTime)
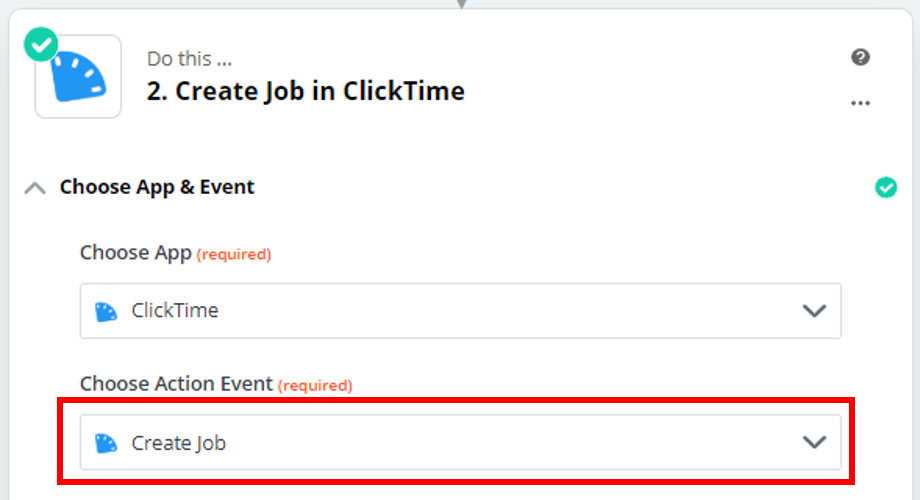
- The ClickTime app for Zapier has multiple actions. This allows you to automatically create single and multiple entities within ClickTime. Since the goal of this post is to automate our ClickTime project creation, we will set up our Zap action as follows:
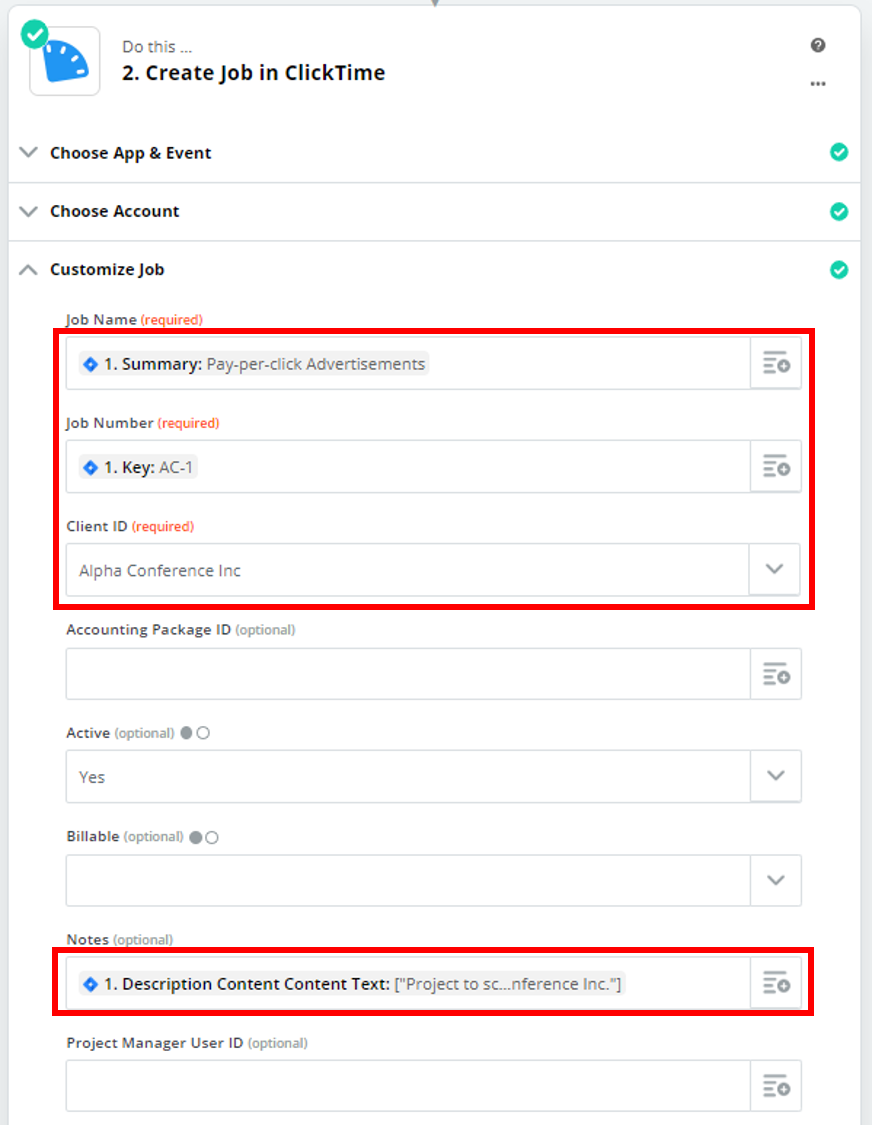
- For the ClickTime Job configuration, we will map our Jira summary field to our ClickTime Project Name, the Jira issue key to our ClickTime Project Number, and we’ll add the issue description to our ClickTime Project’s notes.
Remember, our Jira Project will dictate who is our ClickTime client, so we will simply select the appropriate client from the dropdown.
- Zapier will ask you to test this step. By testing this step, you will be able to go into your ClickTime account to verify that the Job was created with the expected values.
- The last step is to turn your Zap on, and that’s it! Now every new Jira issue you create will have a corresponding ClickTime Project so your employees can track time against it!
If you would like to make this workflow more robust to fit your needs, or would like to have a conversation about a custom solution for your organization, feel free to contact us -- we are always happy to help!


